|
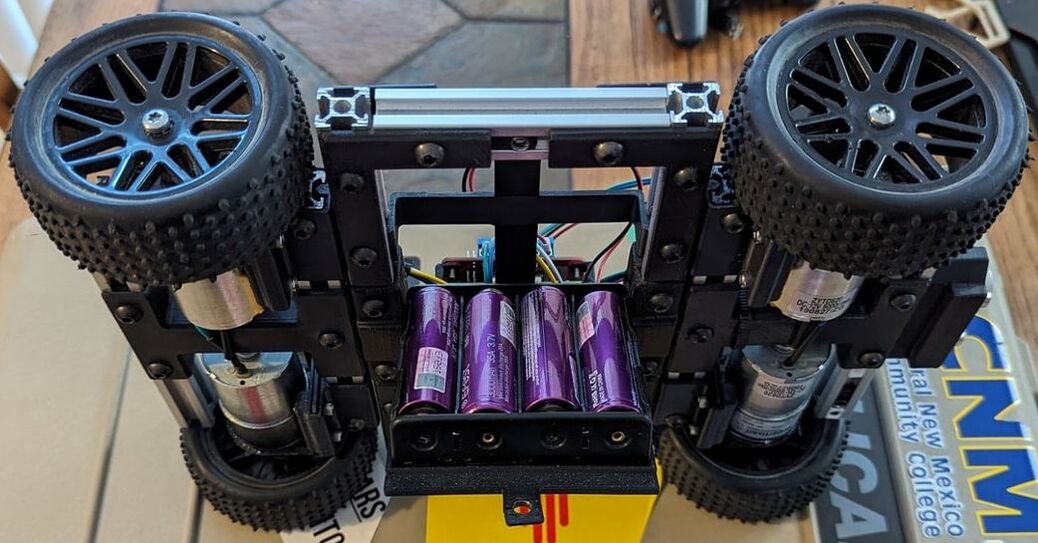
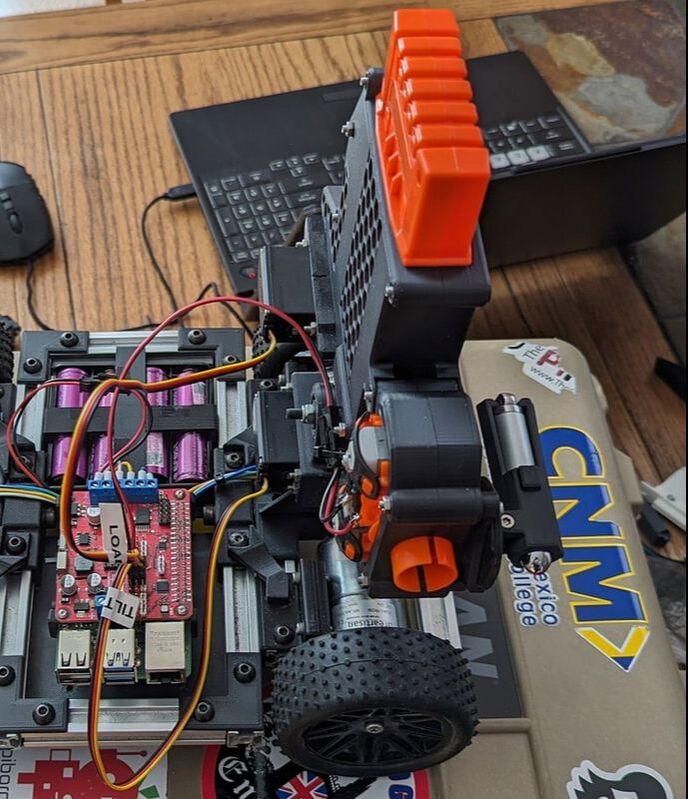
When we began designing Hal 4.5, we had a few requirements that we needed to meet, namely the size and weight parameters set by Pi Wars. We also wanted to use as many parts from Hal 4K as possible, since he didn’t get to compete in Pi Wars 2020. We also wanted Hal 4.5 to be strong, light and use a majority of 3D printed parts. In order to make sure we met those requirements; Hal was designed using AutoDesk Fusion and the 3D printed parts were made with a Raise 3D E2 printer using ASA filament. Building the ChassisWe explored a few concepts before we decided on the final design. Concept 1: Direct drive with a 3D printed base plate. Simple, but not easy to modify and only as strong as the 3D printed plastic. 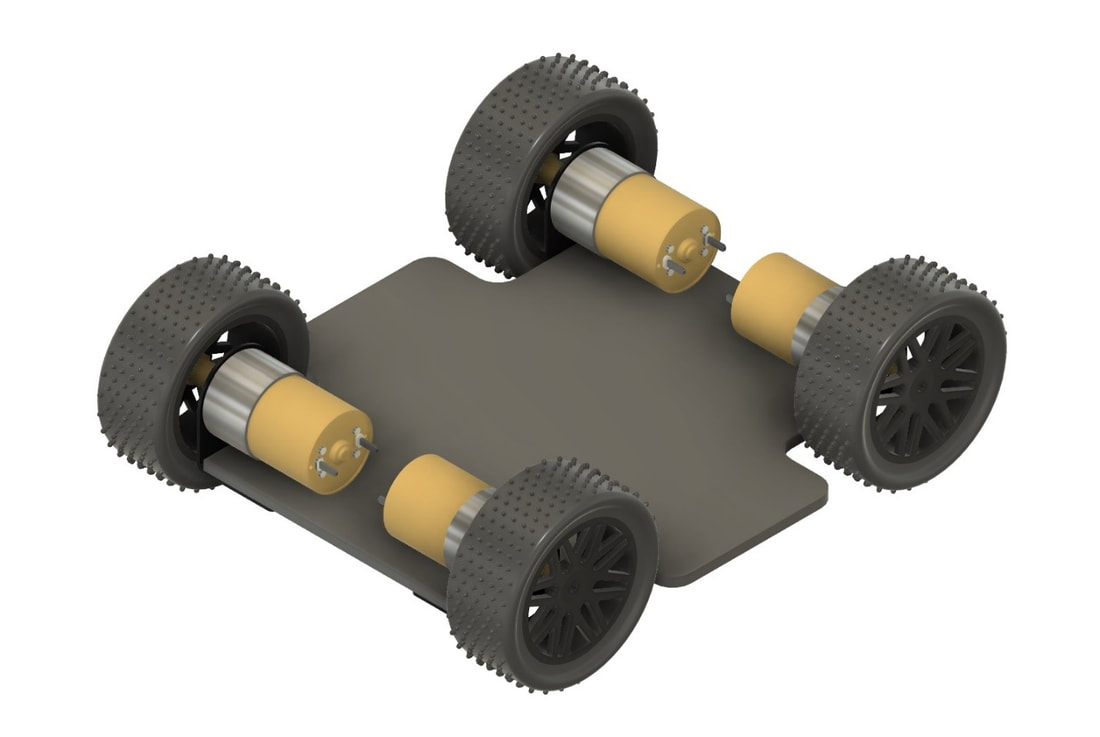 Concept 2: A variation of concept 1 with gearing, which could allow us to change gear ratios depending on the challenges we were running. A more complicated design with less room on the base plate. The motors have plenty of torque for a direct drive application, so there was no need to deal with the added complexity of gearing. 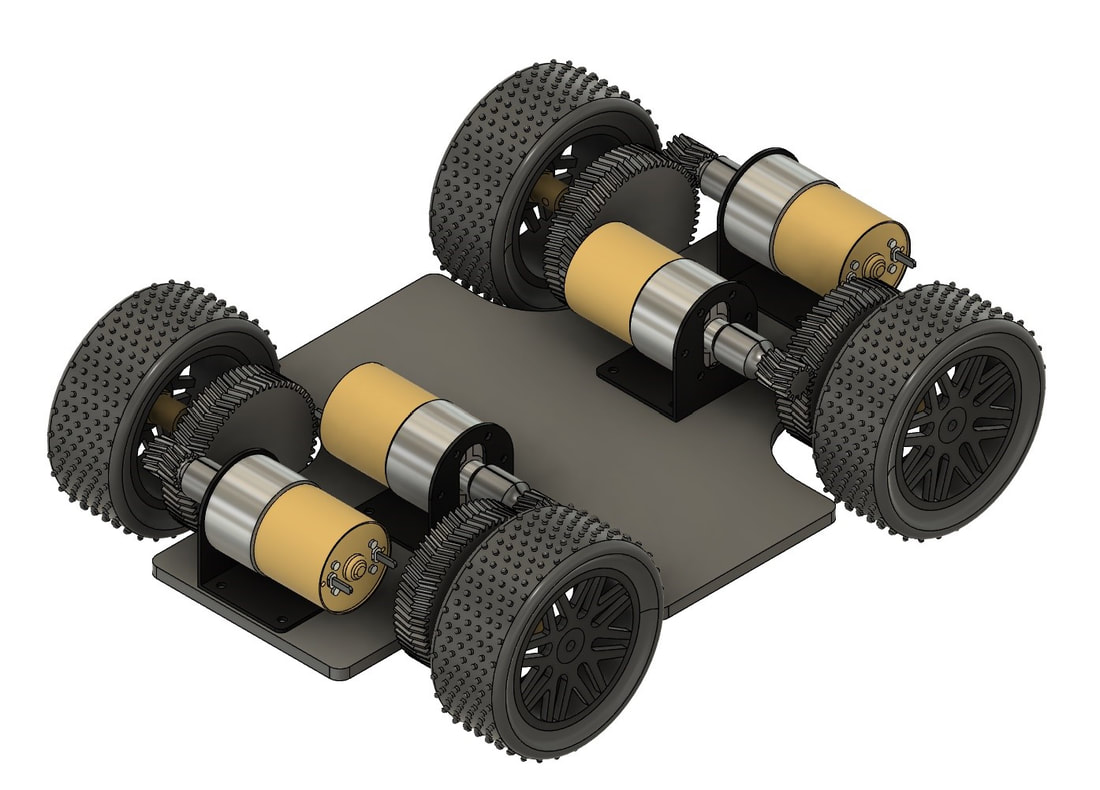 Concept 3: Another direct drive setup, this time using 15mm x 15mm extruded aluminum which makes Hal super strong and rigid. It also makes it very easy to bolt attachments on with a t-nut and an M5 bolt. As you can see below, this was the winning concept. This design also allowed us to give Hal some articulation. Both the front and rear axles and can pivot, which enables him to deal with obstacles with ease. 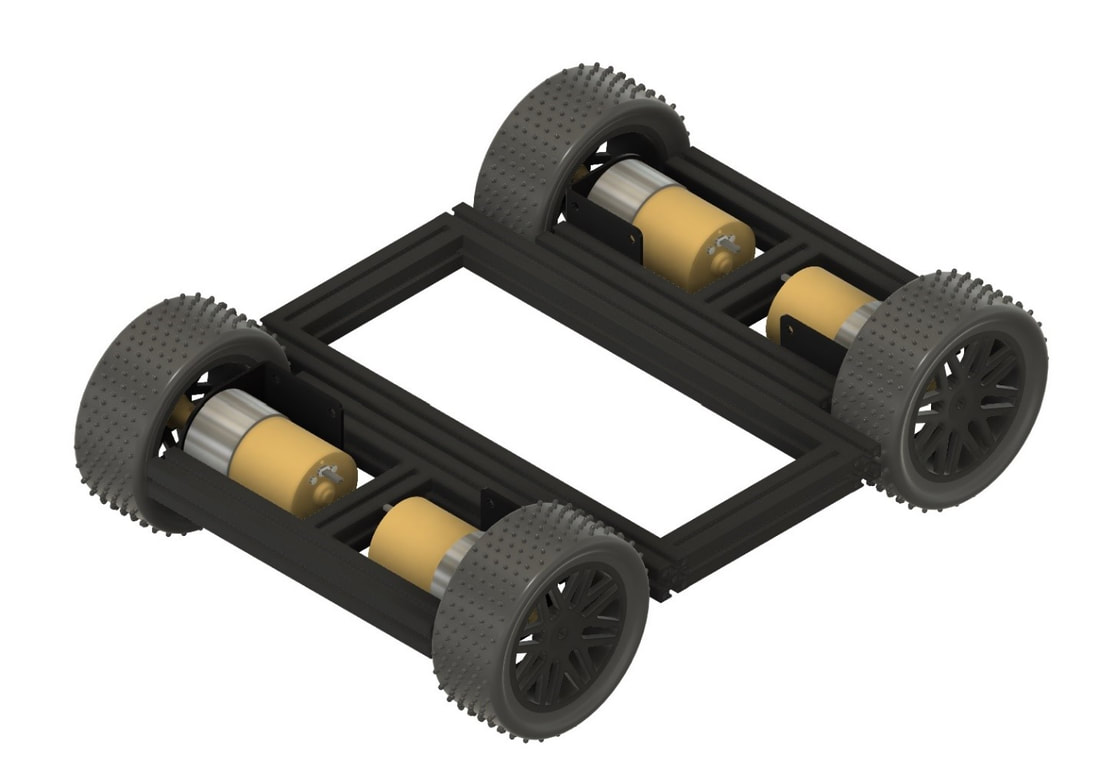 WINNER WINNER 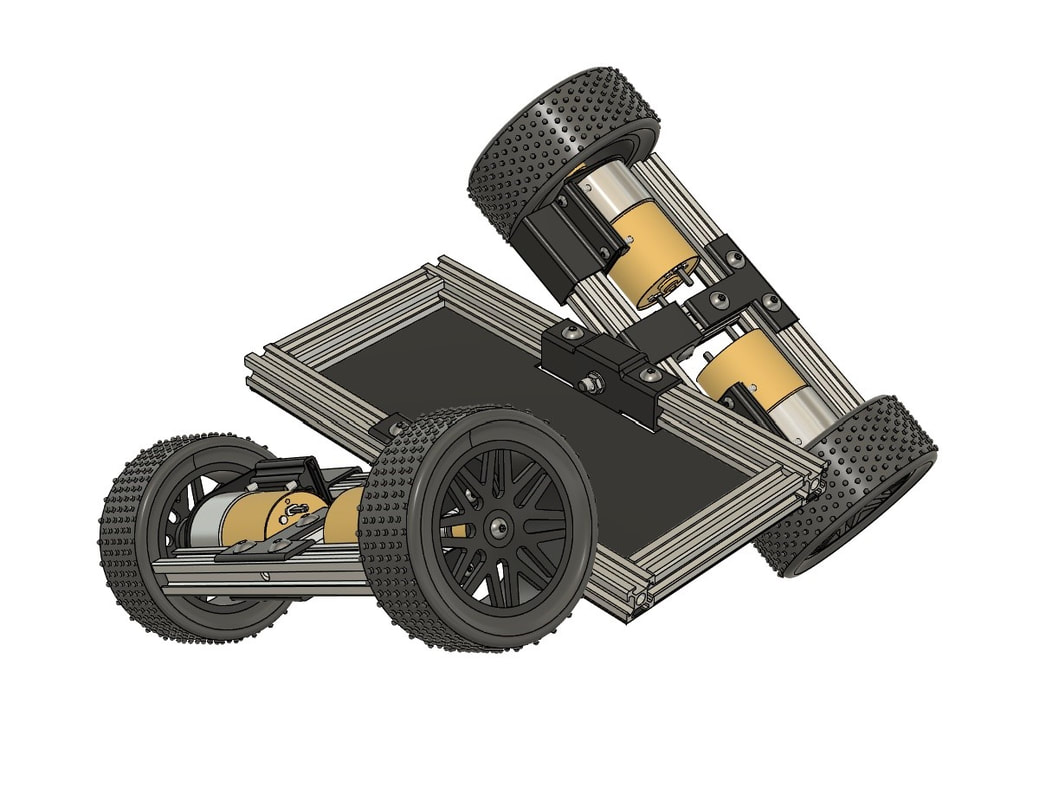 Each axle is attached to the center electronics bay with an M6 x 50mm bolt that is screwed directly into a piece of extruded aluminum. The articulation of the axle is provided by a 608 bearing on each axle. Core ElectronicsHal’s brain is a Raspberry Pi 4 with a Red Board motor controller hat. The Red Board can only control 2 motors at a time, so Hal’s left motors are connected to one motor output and the right motors are connected to the other. The Red Board also has headers on it with GPIO passthroughs that allow us to control up to 16 servo motors or power accessories. 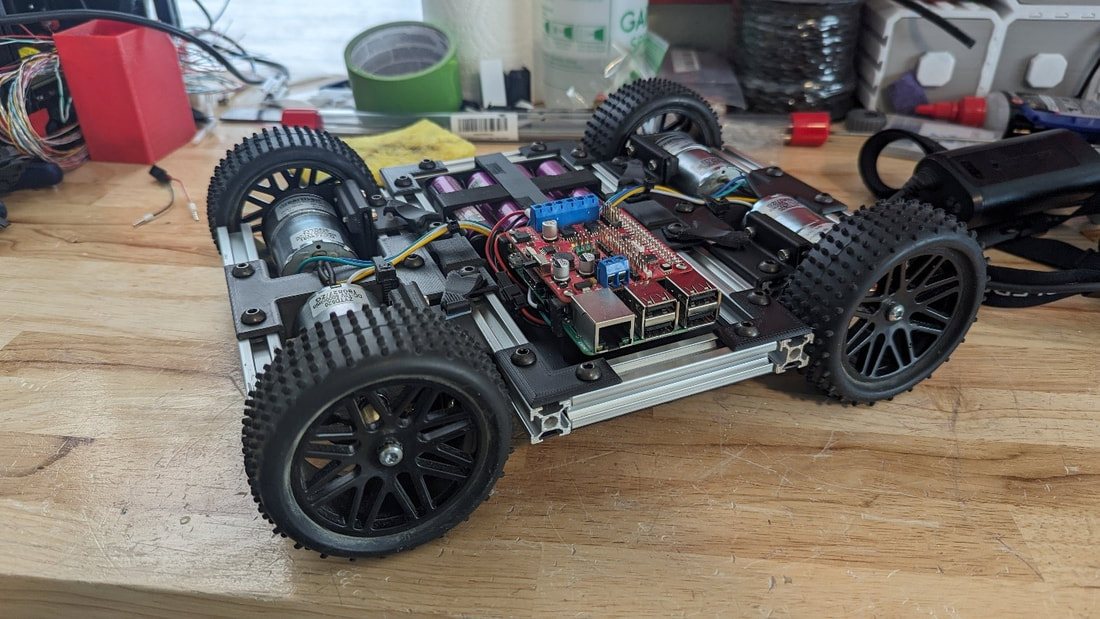
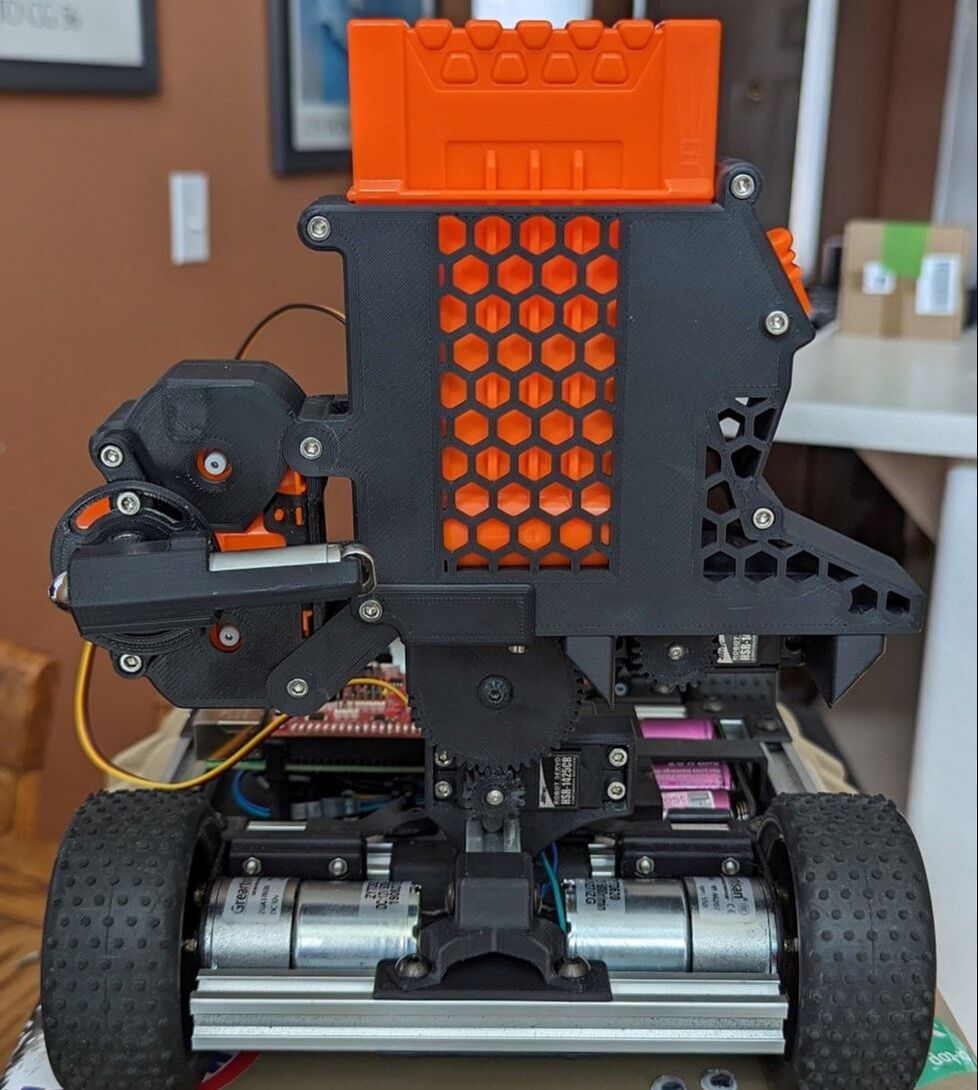
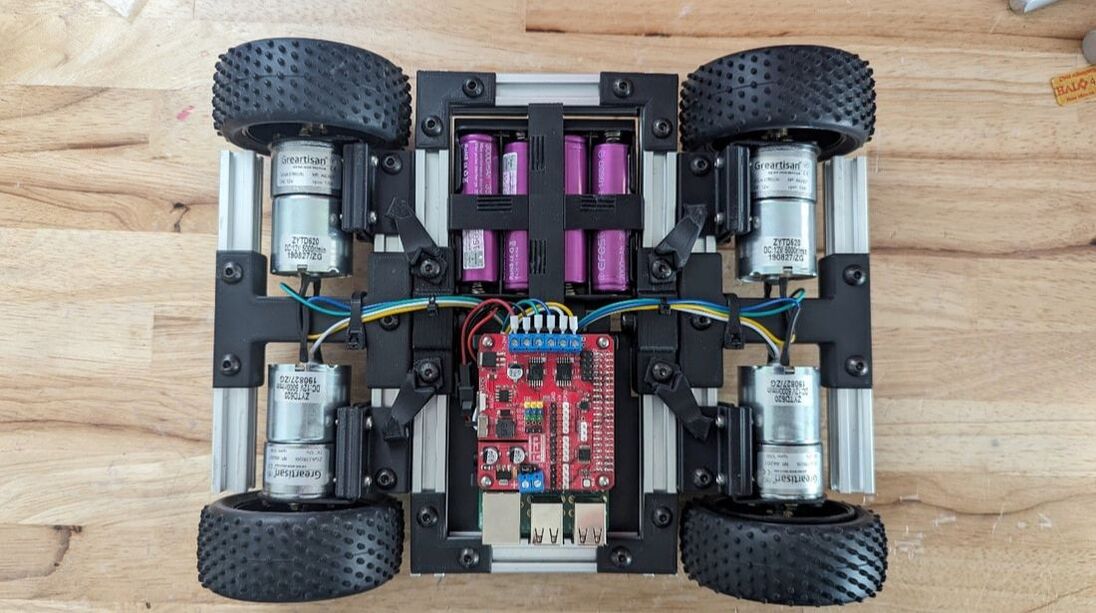 We also put a lot of thought into ease of maintenance and repairs. The motor mounts are attached to the extruded aluminum via a pair of M5 bolts. Simply remove the bolts and the motor and wheel assembly slides off. Should we need to replace a motor, we just need to pull off that assembly and unplug that motor from the wiring harness. Then we attach the new motor to the wheel assembly and plug it into the wiring harness. The ChallengesFor the Escape Route challenge, we are using an ultrasonic sensor mounted to Hal’s front bumper. The sensor is an HC-SR04 that is triggered by the Pi. When the sensor hears the return echo, it sends a 5VDC signal back to the Pi which would blow up the GPIO pin since it’s expecting a 3V3 signal. To fix this, we built a voltage divider to knock that 5V pulse down to 3V3. When we were planning out how to handle this challenge, we considered use 3 ultrasonic sensors, so the voltage divider circuit is configured for 3 sensors. After testing though, we decided to K.I.S.S. it (Keep It Simple, Stupid) and only use 1 sensor. (See Below) 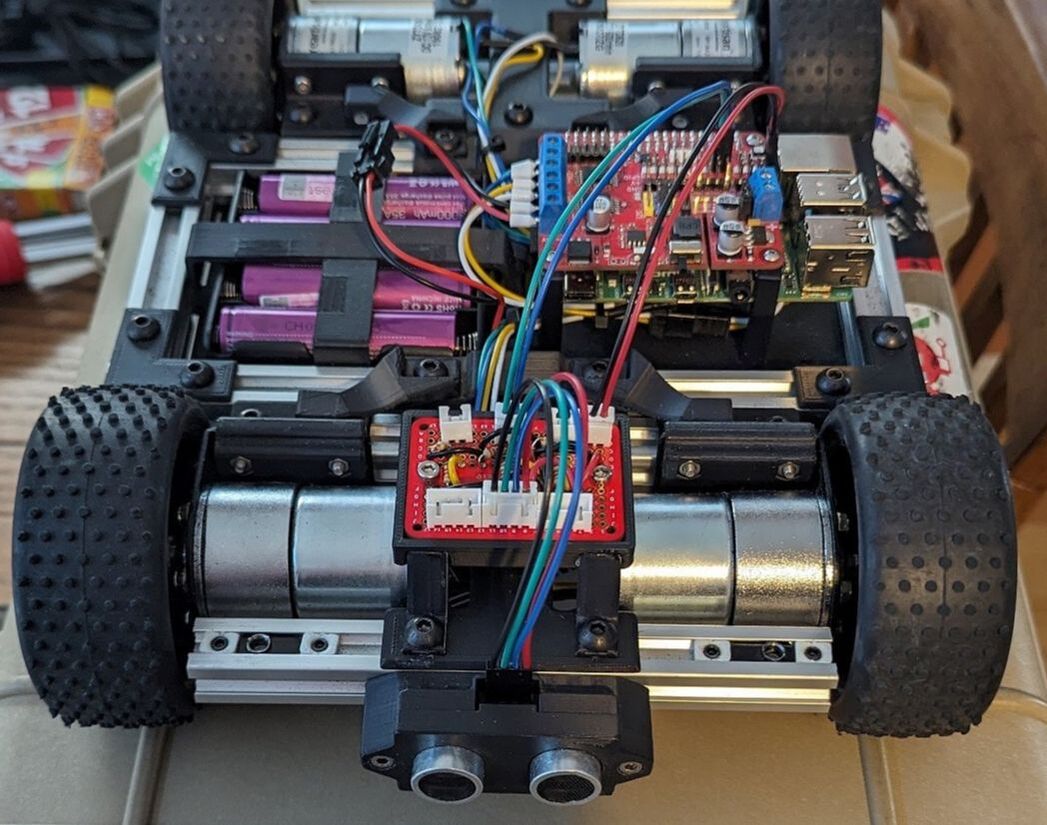 Lava Palava and Minesweeper require a slightly different approach. A downwards looking Pixie Cam allows us to follow a line as well as find mines.  The Eco-Disaster requires yet another strategy, this time we decided to assume direct control of Hal and drive this manually. We did outfit Hal with some mean looking forks that he can use to split up a group of barrels as well as herd them towards the correct endzone. 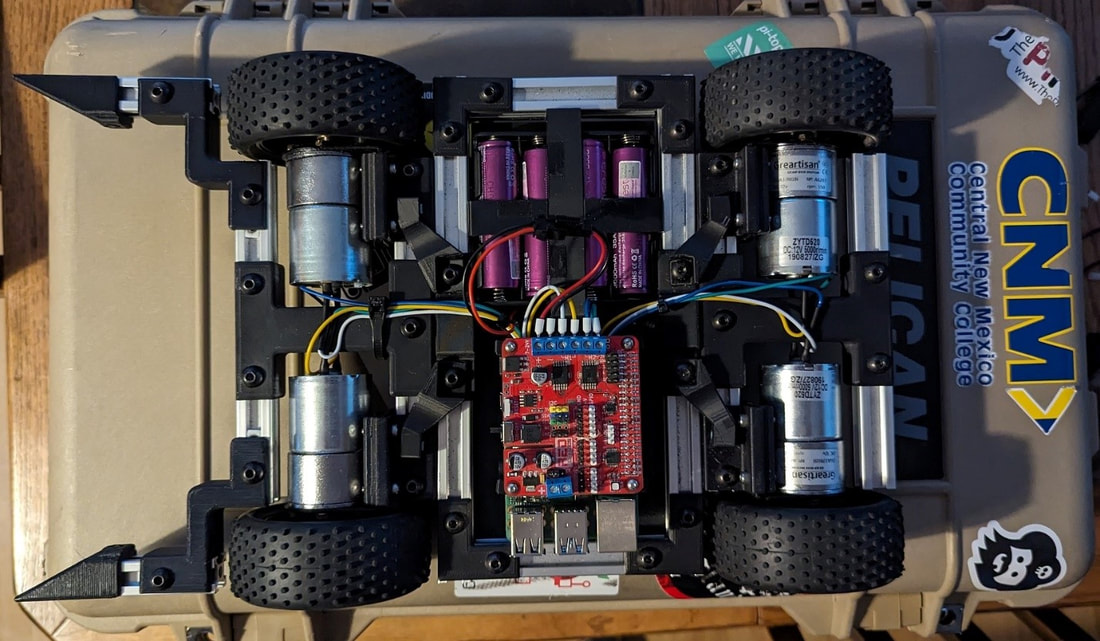 Pi-Noon: The Pi-Noon connector is attached to Hal’s front bumper the same way as the ultrasonic sensor. Other robots better look out! In the Temple of Doom Hal will be in his purest form, just the core robot with his trick articulating axles. He does have one trick up his sleeve for this challenge. The springs we’re using ride on Teflon tubes which allow Hal to flex his way over obstacles with ease. The Zombie Apocalypse challenge was by far that most challenging challenge to design. But if there’s one thing us Americans love more than apple pie and baseball, it’s our "Right to Bear Arms". We equipped Hal with a Nerf dart launcher, a top loading magazine and a laser targeting system in order to make sure he could protect us from the zombie hordes. We also made sure he could hit targets at different elevations by allowing him to pivot the blaster up or down.
Design DifficultiesThe core robot has been surprisingly robust, though as with any engineering project iteration is the name of the game. The initial design for 3D printed straps over the battery pack where not that great and they required a redesign.
The 608 bearing housings are a core structural element of the design as they hold the center electronics bay together and allow the axles to pivot. And they had a habit of cracking under normal use. To solve this, we redesigned the housing to make it more robust and we took a lot of strain off the bearing by threading an M6 screw straight into one of the extruded aluminum bars. The attachments for each challenge evolved quite a bit during testing, either to make broken parts more robust or to tweak the design to be more efficient. As mentioned above, designing and building a robot is all about iteration: design something, test it, figure out why it doesn’t work (because it almost never works on the first try), fix that problem and try again. Rinse and repeat until you have a design that is good enough to do what you want it to do. The CNM HackerSpace team is looking forward to our trip to Cambridge and competing against all the teams from around the world. See you on April 21st.
0 Comments
Leave a Reply. |
AuthorThis blog is being collaborated by the the entire team, and entered by the one and only Asia. Archives
April 2024
Categories |
- Home
-
My IT Instructor
-
Student Resources
>
-
CNM Courses
>
- CNM - Cisco Self Enroll Courses
- CIS-1410 IT Essentials Hardware
- CIS-1415 Network Essentials
- CIS-1605 Internet of Things
- CIS-1610 IT Essentials Software
- CIS 1696 Introduction to Competitive Robotics
- CIS-2620 Configuring Windows Server
- CIS-2636 Cloud Computing
- CIS-2650 Advanced Windows Server
- CIS-2670 Computer Security+
-
CNM Courses
>
- Instructor Resources >
- NCTC
- Let's Get Social
- Books I Recommend
-
Student Resources
>
- WASTC
- #PiWars Blogs
- Pi IT Up!
- CNM HackerSpace
- Robotics Resources
- Workshop Information
 RSS Feed